FAQ >> WordPress Backup Plugin Installation Instructions

WordPress Backup Plugin
|
|
To install the myRepono WordPress Backup Plugin simply follow the automatic or manual installation instructions below.
Simply log-in to your WordPress administration panel and go to the 'Plugins' section. When viewing the 'Plugins' section select the 'Add New' option to add a new plugin.
The 'Add New Plugin' section allows you to search for plugins, simply search for 'myRepono' and the 'myRepono WordPress Backup Plugin' will be shown along with an 'Install' option. Simply select the 'Install' option and WordPress will automatically install the plugin.
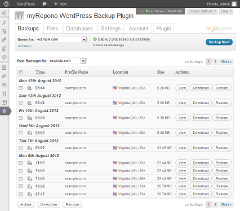
Once installed, a 'myRepono' option will be shown under your WordPress administration panel menu, just below the 'Settings' option. Select the 'myRepono' option and follow the on-screen instructions to complete the setup process.
Download the myRepono WordPress Backup Plugin ZIP file.
Step 2.
Extract the files and directories from the WordPress Backup Plugin ZIP file to your local computer.
Step 3.
Create a directory called 'myrepono-wordpress-backup-plugin' in your WordPress '/wp-content/plugins/' directory.
Step 4.
Upload the 'readme.txt' file and all '*.php' files to your WordPress '/wp-content/plugins/myrepono-wordpress-backup-plugin/' directory.
Step 5.
Upload the 'img', 'css' and 'js' directories (and files contained within the directories) to your WordPress '/wp-content/plugins/myrepono-wordpress-backup-plugin/' directory.
Step 6.
Upload the 'api' directory (and files contained within the directory) to the WordPress '/wp-content/plugins/myrepono-wordpress-backup-plugin/' directory, and ensure the 'data' directories exists within the 'api' directory.
Step 7.
If using a Unix/Linux web server, ensure the 'api/data' directory is writable (e.g. permissions/chmod set to '755' or '777').
Step 8.
Activate the myRepono WordPress Backup plugin through the 'Plugins' menu in your WordPress administration panel.
Step 9.
Go to 'myRepono' section listed in your WordPress administration panel menu and follow the on-screen instructions to complete the setup process.
If you experience any difficulties when installing the myRepono WordPress Backup Plugin, please contact support immediately.

